Sitecore CDP formerly Boxever is something you are probably hearing a lot about these days. As a developer you can implement it easily and as a marketer you can take advantage of some of the features as soon as it is implemented. Here are the steps in order I did to get started.
1. Get a sandbox account.
Should be able to get a login for the CDB Sandbox from your Sitecore rep. You can find the sandbox site here. This is a shared sandbox so you will need to be careful not to change anything that someone else has setup. It is ok to look and see what others have setup. That is one advantage of a shared sandbox.
When you first login to your sandbox account you should see a message like this:

2. Get your keys and Create Point of Sale Value.
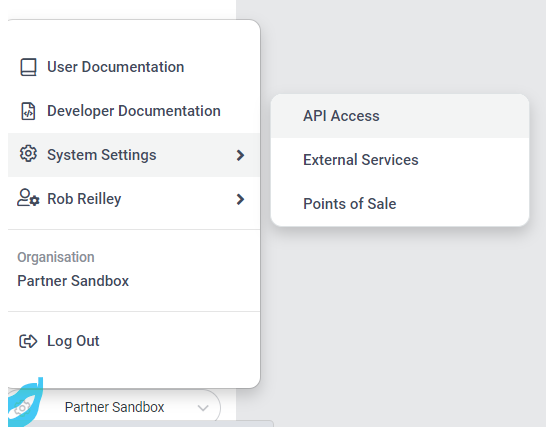
To get your keys go to the gear icon at the bottom left and select System Settings then API Access.


3. Create Point of Sale
Selected System Setting then Point of Sale. Click on the create button and fill out the required fields. In my case since I am using the Lighthouse Demo I called my POS LighthousePOS. Well I can’t remember if I created or it was already out there.


4. Implement code. (SXA Example)
The next step is to implement the script needed to integrate CDP with your site. The script should look like the following. As of this blog the target version should be 1.2 and s.src should be 1.4.8. You will need to add your client key.
// Define the Boxever queue
   var _boxeverq = _boxeverq || [];
   // Define the Boxever settings
   var _boxever_settings = {
       client_key: 'client key goes here', // Replace with your client key
       target: 'https://api.boxever.com/v1.2', // Replace with your API target endpoint specific to your data center region
       cookie_domain: '.lighthouse.localhost', // Replace with the top level cookie domain of the website that is being integrated e.g ".example.com" and not "www.example.com"
       pointOfSale: "LighthousePOS",
       web_flow_target: "https://d35vb5cccm4xzp.cloudfront.net"
};
   // Import the Boxever library asynchronously
   (function() {
        var s = document.createElement('script'); s.type = 'text/javascript'; s.async = true;
        s.src = 'https://d1mj578wat5n4o.cloudfront.net/boxever-1.4.8.min.js';
        var x = document.getElementsByTagName('script')[0]; x.parentNode.insertBefore(s, x);
    })();
I kept this pretty simple and for now created a script and put it under the Base Themes\Main Theme\Scripts folder. I created a script item called cdp-script.

From the menu expand Experiments and choose Web. Click on the Create Experiment button.

From there you want to click on the add variant button.

After you click on Add Variant there will be a side menu that will appear. Choose My Library Templates.

We will choose a simple popup takeover.

Change anything you want to. In this case I changed the background and font colors. You can also change HTML and script

You will see the new Popup in a list. Click on the Preview button, enter in your site with the CDP script and click the go button. If everything worked correctly you should see the popup.

Once the site opens, in this case my local demo site you will see the popup created.


This should get you started. I would take a look at what others have done since it is a public sandbox. There are a lot of possibilities with CDP and we are only scratching the surface. For more information on getting started please take a look at this video that was released as I was putting together this blog.
